Help How to Apply Limit Breaks Acquired

Meathead013

Newbie
Joined
Dec 16, 2010
Messages
3
Gil
0
ok considering that ive played this game for about forty hours and read a jillion guides for it, this seems like a stupid question to even myself but i cant figure out how to apply limit breaks ive received

for example, i have omnislash, catastrophe, cosmo memory, all creation, and highwind

and yet when i go to item>use and try to apply them to the proper characters all i get are messages like the characters dont know wth they are (not for me, dont know anything about that, etc)

ive tried every limit break item on every character just out of frustration, and nuthin. so they just sit there unused

im sure its something simple ive overlooked and will feel dumb after you tell me. BUT PLEASE TELL ME. lol. thx

... im talking of course about the limit breaks listed in my Item inventory, along with all the other items

Mod edit: Please don't double post. :)
 
Last edited by a moderator:
you need to have all the lower level limits to apply level 4 limits!

Got 1st :yay:

I like helping:D

You need to have mastered all the lower level limits of your characters
it could not be more simple that n that:monster:

If you want some pointers to master them quickly just ask away.

AND NO DOUBLE POSTING:lew:
 
The only requirement I'm aware of is that you have to have all other limit breaks for that character already learned. There are 6 for each, 2 LBs at each level.
 
The only way you can use them is to learn all of the Level 3 Limit breaks. Those Limit breaks are Level 4 and cannot be learned until your character has both Level 3 Limit Breaks learned.
 
Cloud=Omnislash

Tifa=Final Heaven

Barrett=Catastrophe

RedXIII=Cosmo Memory

Cid=Highwind:-)srsly:)

Yuffie =All Creation

Vincent=Chaos

Aeris/Aerith=Great Gospel

Cait Sith=Dont have one hes useless, he gets 1 lvl 2 LB:lew:

Yuffie and Vincents Lvl 4 Limits require a bit getting but its all good fun.

Great Gospel Is useless past disc 1............well you know why?
 
ah ok that makes sense, thanks

now next dumb question - how do you acquire all the lover level breaks? my characters are all around level 84 and still are missing quite a few of them so i dont think they are acquired by simply leveling up

i havent really paid attention to limit breaks since i figured they would just show up sooner or later but they havent

so again what easy thing am i missing duuuh lol

heres what i have:

Cloud
L1 - Braver, Crossslash
L2 - BladeBeam
L3 - Meteorain, FinishingTouch
L4 - none

Barret
L1 - BigShot, Mindblow
L2 - GrenadeBomb
L3 - SatelliteBeam, Ungarmax
L4 - none

Yuffie
L1 GreasedLightning, ClearTranquil
L2 Landscaper
L3 Gauntlet
L4 none
 
they would just show up sooner or later but they havent

What like Hemorrhoids?:ffs:

They are gained through battles and defeating large groups of enemies.

The First LB of each Level is gained through combat and defeating enemies,
the 2nd LB is gained through repeated use, meaning you just have togain them and use them.

I tell ya............bloody newbies.........mumble.......:rage:
 
ahh ok, they level themselves via use. ok, see ive never seen that explained anywhere in the hundreds if not thousands of pages of guides ive read

ok final question (for now):

ive been posting on message boards for like thirty years (yes even before the graphic internet and yes im that old) and this is the first time ive ever had posts edited for double posting

just curious, why would anyone care if i make two or more posts back to back?
 
I was just kidding its not my place to say DONT DOUBLE POST! even though I did:lew:

the Mods have a thing about because therte is a an "EDIT" button at the bottom of each post that you can use t amend the original and subsequent post you make:elmo:

Other than that the Mods here are just Power Hungry and bully you :lew:


See you Missing Climhazzard for Cloud and a punch move for Barrett.......Knock out Punch I think? and the 2nd LB for all of Yuffies limit levels.

Do you have any Apple Juice?
 
Cloud Strife

Character_Cloud.jpg


LEVEL 1

First
Braver - Cloud Jumps up and slashes an enemy.

Required to Learn: (initially learned)

Second
Cross-Slash - Cloud does a series of strikes at an enemy, it can sometimes paralyze the enemy as well.

Required to Learn: Use Braver 8 times.

LEVEL 2

First
Blade Beam - Cloud puts his sword over his shoulder (as if to power the sword up) and swings his sword
towards an enemy and a bright beam of energy hits it.
If there is more than one enemy, the energy wave then splits into slightly smaller waves, which hits any other enemies on the battle field.
The smaller waves does about 1/3 of the damage of the bigger energy wave.

Required to Learn: Kill 120 enemies.

Second
Climhazzard - Cloud thrusts his sword deep into an enemy, then leaps upwards,
causing lots of damage. This works very well, but it can only be used on one enemy.

Required to Learn: Use Blade Beam 7 times.

LEVEL 3

First
Meteorain - Cloud leaps into the air and hurls down several meteors which hits all enemies.
Best used against one opponent, but can also be used against weak groups.

Required to Learn: Kill 320 enemies.

Second
Finishing Touch - Cloud swings his sword above his head, causing a whirlwind, that sweeps
away most enemies, excluding bosses. If they're not swept away, the fall back to the ground will still do big damage.

Required to Learn: Use Meteorain 6 times.

LEVEL 4

OMNISLASH - This is Cloud's Ultimate 4th Limit Break. Hitting for 15 times, it can cause a phenomenal amount of
damage to several opponent's, or a single enemy.
Location: This can only be found at the Gold Saucer, in the Battle Arena for 64,000 (!!) Battle Points in Disc 1 or 32,000 (!) Battle Points in Disc 2-3.


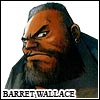
Barret Wallace
Character_Barret.jpg


LEVEL 1


First
Big Shot - Barret first collects a large amount of orange energy in his gun, and then releases it at an
enemy. This is only really helpful in the beginning of the game, when the enemies are weak

Required to Learn: (initially learned)

Second
Mindblow - Barret collects a large amount of blue energy, then releases it at an enemy. This
does not do damage, but instead drains the opponent's MP.

Required to Learn: Use Big Shot 8 times.

LEVEL 2

First
Grenade Bomb - Barret unleashes a large amount of explosives at all enemies. This causes
a fair amount of damage to all enemies.

Required to Learn: Kill 80 enemies.

Second
Hammerblow - Barret sends an enemy soaring into space. This then kills that enemy.
It will
not, however, kill bosses and some stronger enemies.

Required to Learn: Use Grenade Bomb 8 times.

LEVEL 3

First
Satellite Beam - Barret calls for an attack from the skies for this limit break. As this is stronger than the Grenade Bomb,
it's very helpful against a group, but not so much against a single enemy.

Required to Learn: Kill 160 enemies.

Second
Ungermax - Barret unloads a large amount of ammunition into a group of enemies, or a single
enemy. Sometimes this limit break can be more helpful than the Satellite Beam, because it hits more times.

Required to Learn: Use Satellite Beam 6 times.

LEVEL 4

CATASTROPHE - Barret's 4th limit break is exactly that. A Catastrophe. It hits for a large amount of damage
to all enemies, and will definitely come in handy.
Location: This can be found in North Corel, in the tent to the left of the well.
But only after you stop the Runaway Train from destroying North Corel, (although you can still get the limit if you failed to save the town) on Disc 2.
Talk to the lady in the tent and she will give Barret the CATASTROPHE Limit Break.

Required to Learn: (requires item)

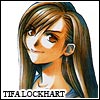
Tifa Lockhart

Character_Tifa.jpg


All of Tifa's limit breaks are linked, for example, you have all of her limit breaks up to Dolphin Blow,
in a battle you use her limit break and get a 'HIT' in every Slot, Tifa will (in order) do Beat Rush, Somersault, Waterkick, Meteodrive
then Dolphin Blow. So if you have all her limits, that's a 7 hit combo!
However if you get too many misses in a slot, Tifa will not perform the respective attack.
Note that getting 'Yeah!' in a slot gives Tifa's attacks more power.

LEVEL 1

First
Beat Rush - Tifa gives a single enemy a good few punches, for her first in the combo.

Required to Learn: (initially learned)

Second
Somersault - Placing her foot on an enemy, Tifa kicks off in somersault fashion, for her second attack.

Required to Learn: Use Beat Rush 10 times.

LEVEL 2

First
Waterkick - Tifa does a fast sweeping kick, that appears as a wave of water (her limits are not elemental however).

Required to Learn: Kill 95 enemies.

Second:
Meteodrive - Tifa grabs an enemy and performs a quick backdrop, for her fourth hit.

Required to Learn: Use Waterkick 7 times.

LEVEL 3

First
Dolphin Blow - Tifa calls upon a dolphin friend, who does an enemy some fair damage, for Tifa's fifth combo.

Required to Learn: Kill 190 enemies.

Second
Meteor Strike - Grabbing an enemy again, Tifa takes the monster high into the air and hurls
him to the ground for attack number six.

Required to Learn: Use Dolphin Blow 6 times.

LEVEL 4

FINAL HEAVEN - Tifa's 4th limit break. Tifa attacks with all her 6 limit breaks as usual, (as long as you've learned them and not got any 'Misses' in the slots)
then Tifa charges her fist and punches an enemy with the power of an Atomic Explosion, for her seventh 'Heaven' finale.
Location: This Limit can be obtained by playing the piano in Tifa's house in Nibelheim, after finding the 'Real Cloud' on Disc 2 onwards.
Make sure you have Tifa in your party when you play the piano.
The tune will be a familiar one:

PS_X.gif
PS_SQUARE.gif
PS_Triangle.gif
PS_L1.gif
+
PS_Triangle.gif
PS_L1.gif
+
PS_SQUARE.gif
PS_X.gif
PS_SQUARE.gif
PS_Triangle.gif
PS_L1.gif
+
PS_X.gif
PS_Circle.gif
PS_X.gif
PS_SQUARE.gif
PS_X.gif
.

You can also play the 'Highwind' theme by pressing:
Down, Left, Up,
PS_L1.gif
+
PS_Triangle.gif
PS_L1.gif
+
PS_SQUARE.gif
, Down, Left, Up,
PS_L1.gif
+
PS_X.gif
, Right, Down, Left, Down. (But it doesn't do anything.)

Tifa will then reach for the music sheets and find a letter addressed to her from her teacher, Zangan.
She will also find the Limit Break manual that he left for her.

If you play the tune correctly on the piano before the 2nd disc you will get 1 GIL,
if you almost do the tune on disc 2 onwards, (with Tifa in your party) you will get 1 GIL.

Required to Learn: (requires item)

Aeris Gainsborough

Character_Aerith.jpg


LEVEL 1


First
Healing Wind - Aeris calls upon holy winds to heal your party.

Required to Learn: (initially learned)

Second
Seal Evil - This will paralyze an enemy, as well as silence it if you are lucky.

Required to Learn: Use Healing Wind 7 times.

LEVEL 2

First
Breath of the Earth - Heals your entire party of any Status Ailments (poison, sleep, silence, etc..).

Required to Learn: Kill 80 enemies.

Second
Fury Brand - Aeris will fill up your party's limit bars, but of course it will deplete her of her own.

Required to Learn: Use Breath of the Earth 5 times.

LEVEL 3

First
Planet Protector - Makes your party invincible, (they will receive no damage) for a short amount of time.

Required to Learn: Kill 160 enemies.

Second
Pulse of Life - Gives your entire party full recovery, same effect as a Tent.

Required to Learn: Use Planet Protector 5 times.

LEVEL 4

GREAT GOSPEL - Heavenly angels come, blessing your party with a full recovery, as well as invincibility. This is one of
the hardest Limit Breaks to get and is received after you get the Mythril from the sleeping man near Junon.
On the first Disc, get on the Buggy, (obtained at the Gold Saucer) and drive to Costa Del Sol. Talk to the man next to the ship and he will smuggle you onto the ship if you give him 100 Gil. Pay him and get on the ship. It will then sail you to the Eastern Continent.
Get off the ship and make your way through Junon until you see a man in the middle of the road waving his arms.
Talk to him and he will offer you a helicopter ride, say you want to go 'out of town', and the helicopter will pick you up. When you are out of Junon, (you should be in the Buggy) head North-East and you will come to a forest area. Head North to where there is a river and cross it.
Go North-East again and you will come to a cave.
Go inside the cave and there will be a Sleeping Man on the floor, talk to him, he usually speaks a load of rubbish, but if he says, "You've already fought [number of how many times you've fought] times..." then keep note of that number and fight enough battles to make the 2 last digits the same.
Go back and talk to the Sleeping Man, if he says, "Who're you?" then you get either the Mythril or an accessory. You get either an Ice Ring or a Bolt Ring, when the last two digits are
even. For example 588 or 144.
You will get the Mythril when the last two didgits are
odd. For example 155 or 433.
What's Mythril?
Mythril is a pretty rare substance in FFVII, although it can't be sold, you can trade it with the Weapon Seller near Gongaga, see below, for Aeris' 4th limit Break Manual, the GREAT GOSPEL, or a Gold Armlet.

But of course, getting the Mythril is only half the mission.

After you've finished Rocket Town, and have received the Tiny Bronco on Disc 1, you need to get to the Weapon Seller's house, you can go back to Costa Del Sol, (if you're coming through Junon) and use the Buggy to go to the Weapon Seller's house North-East of Gongaga.
Or land the Highwind on a peice of land North-East of Gongaga (Disc 2-3) and enter the house.
Talk to the man in there and choose to give him the Mythril.
He will reward you by letting you pick one of the two boxes in his house. If you go up the stairs and pick the black safe-like box, you will get the GREAT GOSPEL!
But if you choose the box by the bed you will get a Gold Armlet, but you don't want that right now, so you can leave it.
You will be able to continue getting Mythrils from the Sleeping Man, but you are only allowed one-at-a-time, so you have to take your old one to the Weapons Seller if you want another!The Weapon Seller will also continue to give you Gold Armlets in exchange for your Mythril if you already got the Great Gospel, which is a good opportunity to get that Gold Armlet if you wanted it.

Required to Learn: (requires item)

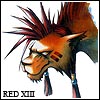
Red XIII (a.k.a Nanaki)


Character_Red_XIII.jpg


LEVEL 1


First
Sled Fang - Gathering speed, Red will sprint towards an enemy, and then quickly make a dash through it,

causing about, double or triple his normal attack damage.

Required to Learn: (initially learned)


Second
Lunatic High - Red will cast haste on your entire party, which comes in handy when fighting bosses, etc.


Required to Learn: Use Sled Fang 8 times.


LEVEL 2


First
Blood Fang - Red will attack an enemy, also receiving a small amount of HP and MP after the damage is done.


Required to Learn: Kill 75 enemies.


Second
Stardust Ray - Red XIII calls a group of stars to fall on all enemies, this causes much more damage than Blood Fang, but will not cure Red.


Required to Learn: Use Blood Fang 6 times.


LEVEL 3


First
Howling Moon - Red will cast berserk and haste on himself, the berserk will cause Red to cause more damage per attack than normal and the haste will cause him to attack more often. Unfortunately the 'Berserk' status, although it increases attack power, also makes Red automatically attack the enemy, giving you no control of his actions whatsoever.


Required to Learn: Kill 145 enemies.


Second
Earth Rave - Red XIII launches a five-hit Elemental combo, that hits each enemy for moderate damage.


Required to Learn: Use Howling Moon 6 times.


LEVEL 4


COSMO MEMORY - Red XIII creates a huge ball of fire, that engulfs all enemies for incredible damage.

Location: You win this after a boss battle with Lost Number (Optional), in the Shinra mansion in Nibelheim on Disc One onwards.
To trigger the fight with Lost Number, head over to the Shinra Mansion at Nibelheim, (you come here in late Disc One, but if you missed it then you can still go back later anyway) and once inside, go left into a room. There's a letter on the floor. Pick it up and it'll give you clues to find the code for a safe...
Here's where to find the clues, codes, and what to do with them:

Clue (#1) Behind the ivories short of tea and ray - Go through door on the left, (just above the room where you found the letter) and you will find a room with a piano. You can play on it,

but the keys for "Te" and "Re" aren't working! So look behind the piano, (press
PS_Circle.gif

around the area) and Cloud will find the first code! Code: Right 36.
Clue (#2) The lid of the box with the most oxygen - Return to the main hall. Go upstairs and turn left. You'll find a treasure chest in a green-house-type room.
Open the treasure chest and you will get an Enemy Launcher (a weapon for Barret). Search the chest again and you will get your second code! Code: Left 10.

Clue (#3) The creak in the floor near the chair on the second floor... then to the left five steps, up nine steps, left two steps, and up six steps (?) - From the main hall, go up the stairs, and go right. Near the Secret Entrance to the basement (you have been there in Cloud's past), search the chair near the bed, you'll hear a creak and Cloud will shake his head. So, press left for 5 of Cloud's steps, then up for 9 steps, left 2 steps, and up 6 steps. This should take you down the corridor outside the room.

You'll be somewhere at the end of the corridor outside the room with the chair. Press
PS_Circle.gif
for the third Code! Code: Right 59.

Clue (#4) What! No clue?! - Read the letter again until you are given the options to read the clues.

Scroll the cursor down to Clue 3, but don't select! Instead go down once more to find a fourth option in invisible ink! Select it, and get the last code! Code: Right 97.

So, now you have:

Right 36
Left 10
Right 59
Right 97

But what do they mean?

Go upstairs, then take a left. Warning! Boss coming up! Get yourself ready!
Go to the room above you, and go to the safe at the back.
Press
PS_Circle.gif
when you're next to it, Cloud will have a bad feeling about the safe....
You'll have 20 seconds to do the code. Here's how:

When the timer comes up, another box with 00 in it pops up as well, it's the number that is currently on the safe door.

So, remember the code? Good. Press right, until the number says 36, STOP! Another number more and you have to start all over again.
When you reach 36 successfully, press
PS_Circle.gif
. Then quickly press left to get to number 10, STOP! Press
PS_Circle.gif
.
Then press right until you reach 59, STOP! Press
PS_Circle.gif
. Last one! Go right again, until you get to 97, STOP! Quickly press
PS_Circle.gif
before the time runs out!
If you make a mistake, just wait for the time to run out, and you can try again.
If you do it, then the safe opens, a red Summon Materia pops out and lands behind you, and a 'successful' box comes up. When you press to get rid of the box,
the Boss, Lost number fights you!
Check the Walkthrough, Secrets or the Boss Guide for the strategy to defeating this Boss.

After he's defeated you'll receive Cosmo Memory as a reward!


Required to Learn: (requires item)


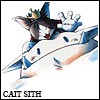
Cait Sith


Character_Cait_Sith.jpg


(Yes, he only has two)


LEVEL 1


First
Dice - Cait Sith throws two or more dice on the ground, and what he rolls determines the amount of damage.

For example, three-six-seven = 1600, (each dot on the dice means a hundred. Example three dots = three hundred).
This limit break grows over time, so Cait Sith will throw more and more dice as the limit grows.

Required to Learn: (initially learned)


LEVEL 2


First
Slots - There are 7 possible combinations for this limit break.

(A few of these are sometimes automatically selected regardless of timing.)

They are as follows:


3 Stars
Mog Dance - A little mog restores the party's HP, MP and any Negative status.


3 Crowns

Toy Soldier - 6 tiny soldiers appear and attack all enemies.

3 Bars

Summon - Cait Sith casts a random summon spell.

3 Mogs

Transform - Cait Sith transforms into a larger version of himself.
His HP increases to 9999 and his MP to 999.
He can use all his normal abilities, but causes greater damage, and cannot use his limit breaks.
The rest of your party vanish for the whole battle, but later reappear with 3333 hit points and 333 Magic points.

3 Hearts

Lucky Girl - A girl appears and your party's hit percentage goes up to 100 % for the rest of the battle.

2 Cait Siths + 1 Bar

Death to all - The entire party is instantly killed, no buts. Don't worry, this is extremely rare,
but cannot be prevented with safety bit etc.

3 Cait Siths

Instant Victory - Death to all enemies, (including bosses) unfortunately this is also extremely rare.

Anything else

Toy Box - A box will appear and do a bit of damage to the enemy.

Required to Learn: Kill 45 enemies.


Cid Highwind


Character_Cid.jpg


LEVEL 1


First
Boost Jump - Jumping into the air, Cid then drives his spear into an enemy,

for a medium amount of damage. This is
really useful in the beginning of the game.

Required to Learn: (initially learned)


Second
Dynamite - Taking out a stick of dynamite, Cid lights it with his cigarette and chucks

it at all enemies. This causes a fair amount of damage to all enemies and is more useful than Boost Jump.

Required to Learn: Use Boost Jump 7 times.


LEVEL 2


First
Hyper Jump - Jumping into the air, (just like Boost Jump) Cid comes down on all enemies hard,

hitting them with a blue pulse of energy, this will sometimes deal death.

Required to Learn: Kill 60 enemies.


Second
Dragon - Cid summons a blue dragon which attacks an enemy for a large amount of damage,

which then gives Cid some HP and MP. This HP and MP gain doesn't help much, unless you have nothing else to replenish HP or MP.

Required to Learn: Use Hyper Jump 6 times.


LEVEL 3


First
Dragon Dive - Cid jumps down on all enemies several times, making big explosions.

The hits do a medium amount of damage each, but against a single enemy, this would deal huge damage. This limit will sometimes deal death.

Required to Learn: Kill 135 enemies.


Second
Big Brawl ~ Cid shows off his fighting skills by attacking all enemies very fast, this and Dragon Dive definitely come in useful.


Required to Learn: Use Dragon Dive 5 times.


LEVEL 4


HIGHWIND - Cid calls for some assistance from the airship "Highwind" for his 4th limit break.

The airship will drop a load of bombs on all opponents. Very useful for causing great damage on one or more enemies.

Location: Found underwater, on Disc 3, the HIGHWIND is in the cargo bay of the sunken Gelnika airplane.

The Gelnika is a sunken Shinra plane, located south-east of the Gold Saucer, use the Submarine near the dock there and drive into the wreck to enter it.
Then enter the room on the left of the Save Point, if you came here before you Returned to Midgar in late Disc 2, you battle Reno and Rude,
if you have completed the Return to Midgar mission they won't be here.
Go through this room and enter the last room at the end; the Cargo Room.
You'll find lots of excellent items scattered around here, so pick them all up, unfortunately there are just as powerful enemies here to match!
Anyway the Items here are another Megalixir, Spirit Lance, (A weapon for Cid) Outsider, (A weapon for Vincent) Cid's 4th Limit Break Manual, Highwind, and finally the Hades Summon Materia.

That's it, finished! But you might want to stay a little longer and level up against those tricky enemies.

Also, a quick warning; before you leave the Gelnika, SAVE! As there's a chance of Emerald Weapon being right outside it, so you automatically have to battle the weapon!

Required to Learn: (requires item)


Secret Characters


Yuffie Kisaragi


Character_Yuffie.jpg


LEVEL 1


First

Greased Lightning - Yuffie slashes an enemy and, after delivering the first blow,
then jumps back and throws her weapon for a second hit. Does a medium amount of damage to one enemy.

Required to Learn: (initially learned)


Second
Clear Tranquil - Yuffie's only curative limit break, she restores some of the party's HP with blue bubbles.


Required to Learn: Use Greased Lightning 8 times.


LEVEL 2


First
Landscaper - Yuffie slams her fist into ground, causing the ground to rise where all enemies are,

the ground then shatters into tiny pieces, causing a large amount of damage to all enemies.

Required to Learn: Kill 65 enemies.


Second
Bloodfest - Yuffie delivers a quick series of blows to all enemies.

The hits do a medium amount of damage each, but the damage will quickly build as the limit break grows.
This limit is not very good when there are a lot of enemies, but very good against a small group of enemies or a boss.

Required to Learn: Use Landscaper 7 times.


LEVEL 3


First
Gauntlet - Yuffie summons a blue vortex below her opponents, damaging all enemies,

Yuffie deals more damage with this limit than with Bloodfest, and will normally come in handy with large groups, unlike Bloodfest.

Required to Learn: Kill 130 enemies.


Second
Doom of the Living - Yuffie will hit all enemies 15 times in total, around the same amount as Cloud's Omnislash.

The hits are generally weak, but still useful against one or more enemies.

Required to Learn: Use Gauntlet 6 times.


LEVEL 4


ALL CREATION - Yuffie toasts her enemies with a huge blast of energy. It causes a huge amount of damage to all enemies.


Location: This is received in Wutai on Disc 2-3, once Yuffie beats the 5 bosses in the Pagoda at the back of the town.

Once she defeats her father, Godo, she will get All Creation. For tips on the Pagoda, check out the optional section of our Walkhrough.

Required to Learn: (requires item)


Vincent Valentine

Character_Vincent.jpg


In most of Vincent's transformations, his HP will double and you will lose control of him, so watch out for that. For example, don't use Vincent's first limit, the Galian Beast, against an enemy that is immune to or absorbs fire, for his fire-based attacks won't be of any use and you won't be able to stop or change his actions unless he is KO'd.


LEVEL 1


First
Galian Beast - Vincent transforms into a purple wolf-like creature with two fire-based attacks:

Berserk Dance: He attacks wildly against an enemy.
Beast Flare: He launches several fire bombs, which explode at a group of enemies.

Required to Learn: (initially learned)


LEVEL 2


First
Death Gigas - Turns into a monster that looks very much like Frankenstein, with physical and lightning based attacks:

Gigadunk: Vincent punches an enemy.
Livewire: Vincent does a lightning based attack against a group of enemies.

Required to Learn: Kill 40 enemies.


LEVEL 3


First
Hellmasker - Turns into a monster with a chain saw:

Splattercombo: Vincent hits an enemy a few times with his chain saw, which could deal instant death.
Nightmare: A single enemy gets hit with Confusion, Mute, Sleep, Frog and Mini at the same time.

Required to Learn: Kill 95 enemies.


LEVEL 4


Chaos - Vincent transforms into a winged demon with two non-elemental attacks:

Satan Slam: A large skull appears and causes massive damage to all enemies. Those that survive are hit by flaming skulls.
Chaos Saber: A lot like 'Slash-All' and hits enemies for a large amount of damage.

Location: You can only get his Limit Break and Ultimate weapon, in Disc 2-3,

You can go to Lucrecia's Cave to find Vincent's 4th Limit and Ultimate Weapon, but also to learn a bit more about Vincent's past...
You can get there by either using a Green, Black or Gold Chocobo, (please refer to the Chocobo Breeding Guide Section for details on how to get these Chocobos, the lake is between Nibelheim and North Corel) or you can hop in the submarine to go underwater and through a tunnel South-East of the Gold Saucer (by the submarine dock and the sunken Gelnika) and surface when you get to the end. You'll be in a very small lake surrounded by mountains. Land the sub at the dock and enter the waterfall. Inside the waterfall/cave you'll meet "Lucrecia" triggering some flashbacks about Vincent's past. Make sure you have Vincent in your party, and head into Lucrecia's Cave to hear a bit about Vincent's past. There won't be anything else here for a long time, (in the later parts of Disc 2 onwards) so come back around the end of Disc 2, and lying in the cave will be the Death Penalty and Vincent's level 4 Limit Break Manual, Chaos.
Remember to have Vincent in your party though!


Here is the link if you need more information about the Limit Breaks or other stuffs.

http://www.finalfantasyworld.co.uk/ffvii/ffvii_limits.php
 
ok considering that ive played this game for about forty hours and read a jillion guides for it, this seems like a stupid question to even myself but i cant figure out how to apply limit breaks ive received

for example, i have omnislash, catastrophe, cosmo memory, all creation, and highwind

and yet when i go to item>use and try to apply them to the proper characters all i get are messages like the characters dont know wth they are (not for me, dont know anything about that, etc)

ive tried every limit break item on every character just out of frustration, and nuthin. so they just sit there unused

im sure its something simple ive overlooked and will feel dumb after you tell me. BUT PLEASE TELL ME. lol. thx

... im talking of course about the limit breaks listed in my Item inventory, along with all the other items

Mod edit: Please don't double post. :)

Simple, you need to have already learned the limit breaks before it. Example;
Cloud has 6 limits before his level 4 limit break. He needs to have EVERY one of them learned before you can use the manual. So you cant have just Braver and Omni-Slash. The same goes for every character. Manuals are only usable if you have learned all of the previous limits before them. Also, Only certain manuals are for certain characters. You can't have Cloud use Great Gospel.
 
Back
Top