Alexander's Artwork

The Master

Use my name
Veteran
Joined
Aug 22, 2011
Messages
679
Location
Somewhere you will never find me...
Gil
0
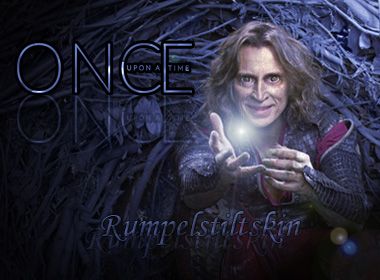
Alright. I decided to finally try and get into GFX... *audience claps and cheers*

But seriously, I'm not that great and I hope to get better... But here is my very first GFX:

Carmeny732copy_zpsec41f8e9.jpg


I have to say though, I did NOT do this on my own :ari: I had a lot of help from my boyfriend, some people on the forum, and whoever made the Carmen pic and the skyscraper pic. All I did was mess around on Photoshop :)

I'm gonna try and get better though... So feedback would be great!

More to come!
 
I think you did a pretty good job, text could be blended a bit better and maybe have the words a little closer but otherwise it looks good, keep practicing and using tutorials and I think you'll become a great gfxer :griin:
 
awwww that one is cuuute Cody Deux! :griin: The text is nice, just needs to be moved up higher and more to the right, I think you could add some more effects. A good thing to do is find an effect you think looks really nice and suits the render then pasting it above the render on a new layer, set the layer to 'soft light' or whatever you like and then erase any bits that look out of place, you can experiment with different layers and stuff.

Nice work :griin:
 
Blending.

One of the best ways for basic blending is to add a new layer and set it on screen.

After that, grab the gradient tool.

Pick black for the background, and a color that matches for the foreground, and drag the tool from top-to-bottom.

After that, adjust the opacity 50% and duplicate the layer and set that to overlay.

Should look something like this.
1335932-VIGJHGU.jpg


See how it's less white, and matches more of the overall sig?

Hope that helps. Also, try smudging some parts of the sig to create flow.
 
Can I ask what system you use, Alex? ^_^ Here's some of my advice anyway;

With gfxs you might have the urge to experiment with a lot of different things all at once, but when you're just beginning it's best to focus on one specific thing and try and better your skills at doing that instead of doing too much at once. For example, when I first started making GFX I used lots of brushes, tons of textures (even if they didn't exactly go together) and I did lots of tacky effects just because I thought I had to do all at once so early on.

Here's some pointers that you could try your hand at one at a time, don't try and practice all skills in one go--give it time.

Lighting;
depending on if you're using GIMP or PHOTOSHOP, doing lighting (or changing the color tones) could either be easy or manually tougher. With PS you can download PSDs and use a color-tone-lighting pack that someone else already made for your usage. (examples: 1. 2. 3. 4. ) Those are just a few examples of PSDs that could aide you with lightning/color affects. I'm not sure how to use PSDs in PS so that's sadly where my knowledge ends for that. However, if you're using GIMP, this is a GREAT place to go for help. In GIMP you can use a sort of "PSD" called XCF . I've tried using them and they're really wonderful if made correctly. With GIMP, all you have to do is save the XCF and open it up in GIMP and then add a new layer with your desired image. That said, some GIMP XCFs are kinda low quality so it's usually better for you to do your own lighting source. You can achieve a good lighting just by messing around a bit. It's okay to make a wacky-looking color tone for your image, what you're trying to achieve is just a basic understanding of how different colors on different layers, set to different filters makes a new look for your over-all color tone. To me, a signature can be complete by just using a beautiful color-tone; so that's why this is my first advice for you, bud.

Here's an example of a real quick lighting I did to show you the important difference that lighting can add to a signature.
without_zps902a9f63.png


To the left you'll see a simple (and not so gorgeous) lighting that I gave to it to add a little somethin' somethin. To the right you'll see the original image, it's a little dull and on the dark side, but the one on the left seems cheery and bright. You can achieve the same basic changes with PS as long as you either use a PSD or change the colors around yourself.
I'd suggest that you try using PSDs until you get a feel for how coloring, filters, and layers work.

Font:
Forgive me, but from what I see you've got the default font that the editing system came with, huh? ^_^ Sometimes, even if you do a nice affect to a font, the font itself can ruin a piece. You might want to look around on DAFONT.com to check out the pretty, unique, strange, and vibrant fonts that you can use. The style of font can really add an extra quality to a piece. The font for the text is probably (in my opinion one of the most important details). For me it's like if I see a really cute outfit and then see a pair of ugly shoes paired with it my entire opinion changes on it entirely. :lew: So you gotta really choose a font that looks professional but fun at the same time (really, just remember to make the font match the rest of the sig)

Text Placement:
I can't really speak on text placement because I think I'm terrible at it. :damon: 
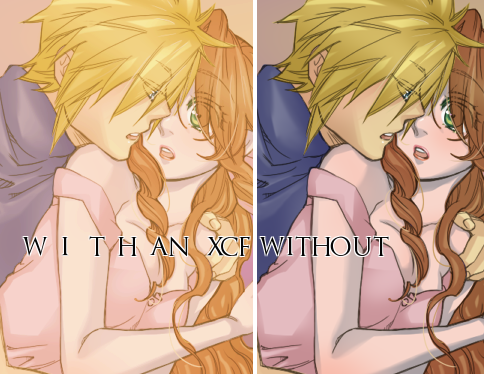
But someone I've always thought to have amazing text placement is Big Casino and Oxide. They really are boss at it. Maybe you can look at some of their pieces and see if you can get a bit of an understanding for it. When I kept noticing I put font in totally weird places I ended up just browsing the "signature" tag on deviantart for hours, just trying to see how others did it so professionally. Sometimes looking at other people's methods of doing something is really the best option for beginners, I know it helped me. Just remember, you don't want your text to be at the bottom or very top of a signature all the time.

Brushes:
Brushes can either make or destroy a signature. Sometimes a person *coughMecough* can get a little outta hand with them. It's in my personally opinion that using a few brushes in a tag are okay--but if you're basing your entire piece with the brushes, chances are it'll look a bit crowded. I actually tend to steer clear from using brushes solely because I don't think I do them very good. So my only advice to you about brushes is tread gently when using them. If you feel like you're using ten different brushes at once, you should probably step back and ask yourself if the signature looks crowded or if the focus of the tag now looks like the background and not the focus.

Anyway, that's all for now.. I didn't want to go into the harder stuff like (vectors) yet, at least until you're comfortable with this stuff.


Lulucopy_zpsa33f80dc.jpg


Alright, alright. The coloring/lighting is very nice, I love the purple tones. The render is a bit rough on her hair, but that could be overlooked. You seem to be having a nice flow of color, you've got her dark navy tones of her clothes, you got the purple color background, and then you have the nice purple font... it's all very nicely done. But the rainbow seems outta place. This is what I mean by "using too many effects at once just cuz it's there" sorta thing. You want to have flow with your signature. The rainbow is a nice affect, but it just doesn't fit this specific signature, you get what I mean?

The text placement could have been an inch or two lower and maybe a little to the left, but the glossy effect of it is very nice and I actually like what you've done with it. Overall, this is a great start.

1335932-VIGJHGU.jpg


Perfect color theme, you made sure to stick to a color theme and that's a great improvement. The squidward render is nicely trimmed and is placed nicely. The font looks wonderful! I love the thin black border it has, and the glossy touch you did to it's upper side really makes it stand out. My only advice is for you to move the text placement up a few inches. Also, a nice color-lighting XCF/PSD would make this even more nice.

Carmeny732copy_zpsec41f8e9.jpg


I love the way you put Carmen in this signature. She's placed perfectly. It's just artistic enough to grab your attention but not too artsy to where it's too strange. I'm not sure what the original image looked like but I'm guessing the city in the background is added? If so, very nice touch. It shows you're remembering to keep a consistent theme to your sig. The blueish-gray lighting is very nice as well--it's one of my favorite color-tones to use. The only thing is... I think the text is unneeded. :hmmm: it almost clutters the bottom half of the tag and we want to avoid that at all costs!
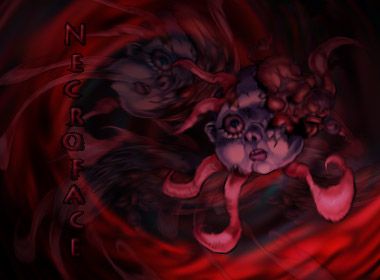
Overall, these are some wonderful firsts, Alex! I know you're gonna be an ace gfx artist once you keep at it. (you're already better than I was when I first started :lew: )​
 
That's very good, Alex! I love the warm colors you used! Plus the soft yellowish lighting up near his face really adds depth! I think it's good with or without text, but IF you'd like you could try adding a nice simple or cursive text right in the grassy area to the left (the font should be between the pumpkins). If you wanted font, I mean. :lew:

Very very good, though, bud! :ohoho:
 
Nice major improvement!

Your text got a lot better as well.

I would just suggest toning the brightness down a little though.
 
This was the only text I liked for this one... I tried multiple variations but I couldn't get them to work...
But I'm pleased with the rest if it :)

CC_zpse7d3bd27.jpg

Very nice, Alex. You're improving more and more each time.

You're text still needs more work, but, one step at a time :lew:

Here's a nice tip for text.

When you're done with your text, do copy visible and paste, so it will come out as a new layer. Now what you wanna do is get your rectangle select tool and highlight your text, after that, try sharpening the text, so it looks more blended in after that.

Also, try adding 1x1 borders to your sigs, it will make them look nicer as well.
 
Was that last one done with the Liquify filter? That's probably my favourite Photoshop tool at the moment. :D You have some really cool stuff here, dude. I won't go too in-depth with criticising, because I'd only be repeating Hayabusa and Alex Mason. I really like your Ajani sig. You mentioned that you botched the lighting on it a bit, by which I'm guessing you mean the top right of the render.

...

:hmmm:

If you've still got the .psd or whatever file format that still keeps the layers, why not put some lighting coming from behind him in that upper right area? Might make that part look less abit more natural against the background.

I'm looking forwards to seeing some more stuff.

Good job! :monster:
 
Back
Top